Tools · All the Things Your Dad Should Have Taught You
How to Use a Cordless Drill: Your First Practice Session
Learn drill controls, bit selection, pilot holes, and controlled screw driving on secured scrap before tackling a real home project.
A cordless drill becomes much less intimidating when you separate its controls into three jobs: gripping the bit, choosing direction and speed, and limiting driving force. Your first lesson belongs on scrap material in a stable work area, not on a wall that may hide wires or pipes. Start with a small, low-risk practice project and the manual for the actual tool.
A drill/driver, impact driver, and hammer drill are different tools. This guide focuses on an ordinary cordless drill/driver used for a pilot hole and a small screw in scrap wood. It does not cover masonry drilling, electrical work, or structural fastening.
Set up the work area
Use a stable bench and secure the wood with appropriate clamps. Keep the planned hole clear of the bench beneath it, using a sacrificial backing board where suitable. Inspect the scrap for hidden nails, screws, or staples. Do not hold a small workpiece in your hand while drilling it.
Wear eye protection and follow the manual for hearing protection, dust control, and other precautions. Tie back long hair, remove jewelry, and keep loose clothing away. Do not wear loose gloves around a rotating chuck. Keep fingers clear of the bit and remember that a recently used bit can be hot.
Check the tool, battery, and charger for damage. Use compatible batteries and chargers, and follow the instructions for charging and storage. A swollen, leaking, damaged, or unusually hot battery needs the manufacturer's handling guidance, not another charging attempt.
Learn the main controls
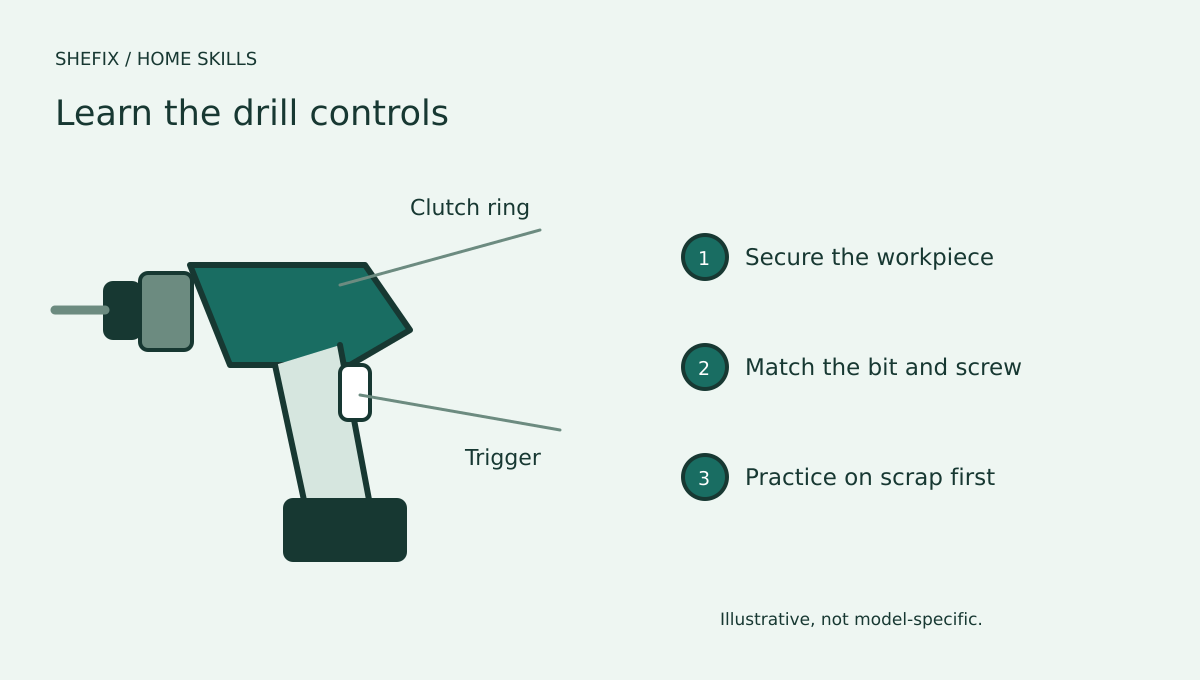
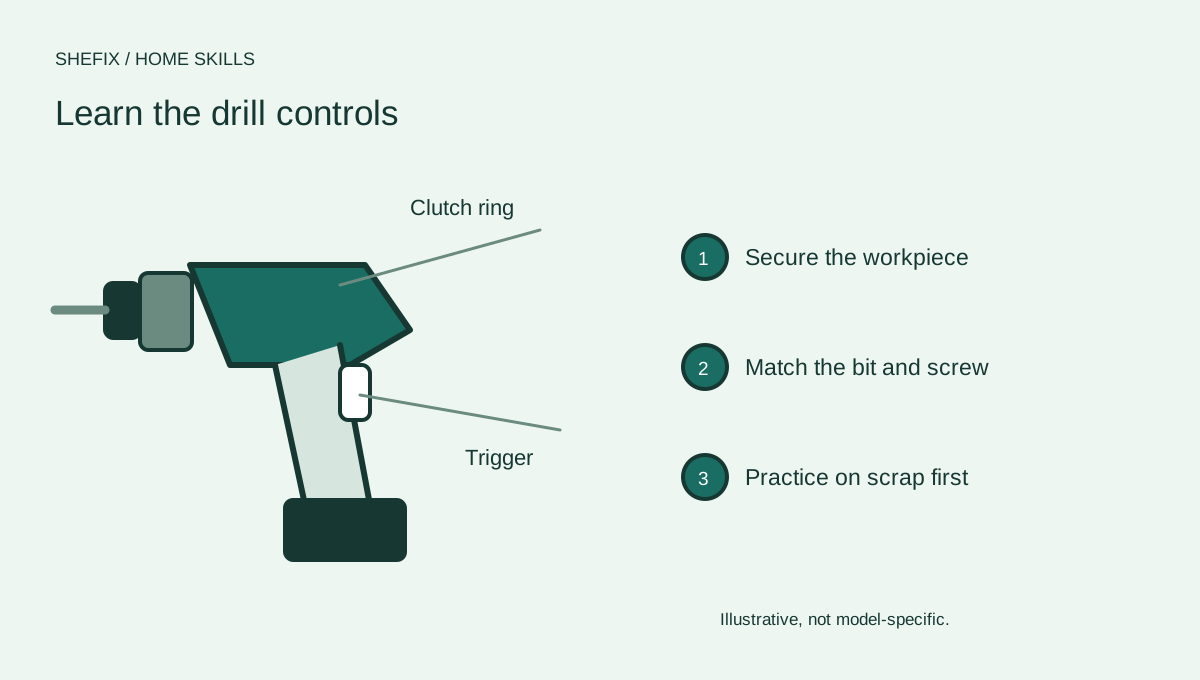
The trigger varies speed on many models. The forward/reverse switch changes direction and may have a center lock position. The gear selector chooses a speed range. The numbered clutch ring on many drill/drivers limits driving torque; a separate drilling position may bypass that limit.
The chuck grips the bit. Follow the manual for installing it and make sure the bit is centered and secure. Do not run the motor while holding the chuck to tighten it unless the manufacturer explicitly instructs that method. Remove the battery or use the prescribed lockout when changing accessories.
Match the bit to the job
A twist bit appropriate for wood makes a pilot hole. A driving bit must match the screw head exactly, including its type and size. A mismatched Phillips, square, or Torx bit can strip the head and slip. Pilot-hole diameter depends on the screw and material, so use the screw manufacturer's guidance.
A screw is not a nail. Different fasteners are designed for different loads and materials. Do not substitute a generic drywall screw for a structural fastener. For practice, choose a compatible small wood screw and scrap thick enough for the screw without letting it emerge where it could cause injury.
Drill your first pilot hole
- Mark the intended hole and confirm the wood is clamped securely.
- Install the correct bit, set the appropriate drill mode and gear, and verify forward rotation according to the manual.
- Hold the drill square to the work, with a balanced stance and control of the tool.
- Begin at low speed so the bit starts on the mark. Increase speed as appropriate for the bit and material, without forcing it.
- Ease pressure as the bit approaches the back of the material. Keep control as it exits.
- Release the trigger and wait for rotation to stop before setting the tool down or clearing debris.
Do not force a stalled bit. Release the trigger, secure the tool, and follow the manual's recovery procedure. A binding bit can rotate the tool suddenly, which is why a stable grip and workpiece matter.
Drive a screw with the clutch
Switch to the correct driving bit and the manufacturer's recommended driving setup. Begin with a conservative clutch setting and test on scrap. Align the bit fully in the screw head, apply enough controlled pressure to keep engagement, and start slowly.
Stop when the screw reaches the intended depth. The clutch can help prevent overdriving, but it does not make judgment unnecessary. Increase the setting only if the test requires it. Do not sink the head so deeply that it crushes the material or damages the joint.
If the bit slips repeatedly, stop and inspect the head, bit fit, and alignment. More speed usually makes a stripping problem worse. A damaged screw should be replaced rather than driven halfway and ignored.
Practice before using it around the home
Repeat a few pilot holes and screws in scrap. Practice stopping at a consistent depth and reversing a screw. Compare how a harder piece of wood changes resistance. This builds tool familiarity without introducing concealed-service hazards.
Before drilling a real wall, identify the assembly, load, fasteners, and hidden-service risk. Use a professional for unfamiliar structures or safety-critical mounts. The ability to operate a drill and the ability to plan a safe installation are separate skills.
Questions homeowners ask
Which clutch number is correct? There is no universal number. Settings depend on the tool, screw, material, and desired result; test appropriately on scrap.
Do I need an impact driver? An ordinary drill/driver handles many small household tasks. Learn the tool you have before buying another one.
Why does the screw head strip? Common causes include the wrong bit, a worn bit, poor alignment, insufficient engagement, or excessive speed. Stop early and correct the cause.
Your printable project checklist
Use your browser's PDF option to keep a copy. Create a free account to keep project records and compare professionals.
Sources & further reading
Follow the instructions for your specific equipment and confirm current local requirements.