Plumbing · All the Things Your Dad Should Have Taught You
How to Unclog a Sink Safely and Know When to Stop
Start with the drain pattern, use low-risk clearing methods, avoid chemical exposure, and recognize when a sink blockage needs professional help.
A slow sink is not an invitation to pour every cleaning product in the cabinet down the drain. The useful first question is where the blockage appears to be. A single slow bathroom sink may have hair near the stopper. Several fixtures backing up together can indicate a larger drainage problem. Start with observation and low-risk methods, and keep chemical exposure out of the job.
This guide covers an ordinary sink with no evidence of a larger sewer backup. It does not cover toilet blockages, sewage cleanup, dismantling a garbage disposal, or opening unfamiliar plumbing. If chemical drain cleaner has already been added, do not plunge, open the trap, or add another chemical. Follow the product safety instructions and tell the plumber exactly what was used.
Read the pattern before you begin
Check other nearby fixtures without running large volumes of water. If a second sink, tub, or toilet is also backing up, stop using the affected plumbing and call a plumber. Gurgling elsewhere, sewage odor with backup, or water emerging from a low drain deserves prompt attention.
For a single sink, remove visible loose debris and inspect the stopper from above. A bathroom pop-up assembly may collect hair just beneath the opening. A kitchen sink may hold grease and food deposits further along the drain. Do not put your hand into a garbage disposal. Keep its power off and follow its manual if the disposal itself is involved.
Set towels around the area, protect the cabinet, and keep children and pets away. Wear gloves and eye protection. Use a separate tool for drain debris, and clean it after use rather than returning it to food-preparation equipment.
Try the least invasive method first
If the stopper is removable without tools under the manufacturer's instructions, lift it and clear visible hair. Some stoppers twist out; others attach to a linkage below. Do not yank on a stopper that resists. A simple plastic hair-removal tool may be suitable for an accessible bathroom drain, but use it gently and keep control of the tool.
For plunging, use a sink plunger with a flat cup. Cover an overflow opening with a damp cloth so pressure is directed into the drain. In a double sink, the other drain may need to be sealed. Add enough water to cover the cup, make a seal, and use controlled strokes. Stop if connections leak or the sink moves.
Understand the trap before deciding to open it
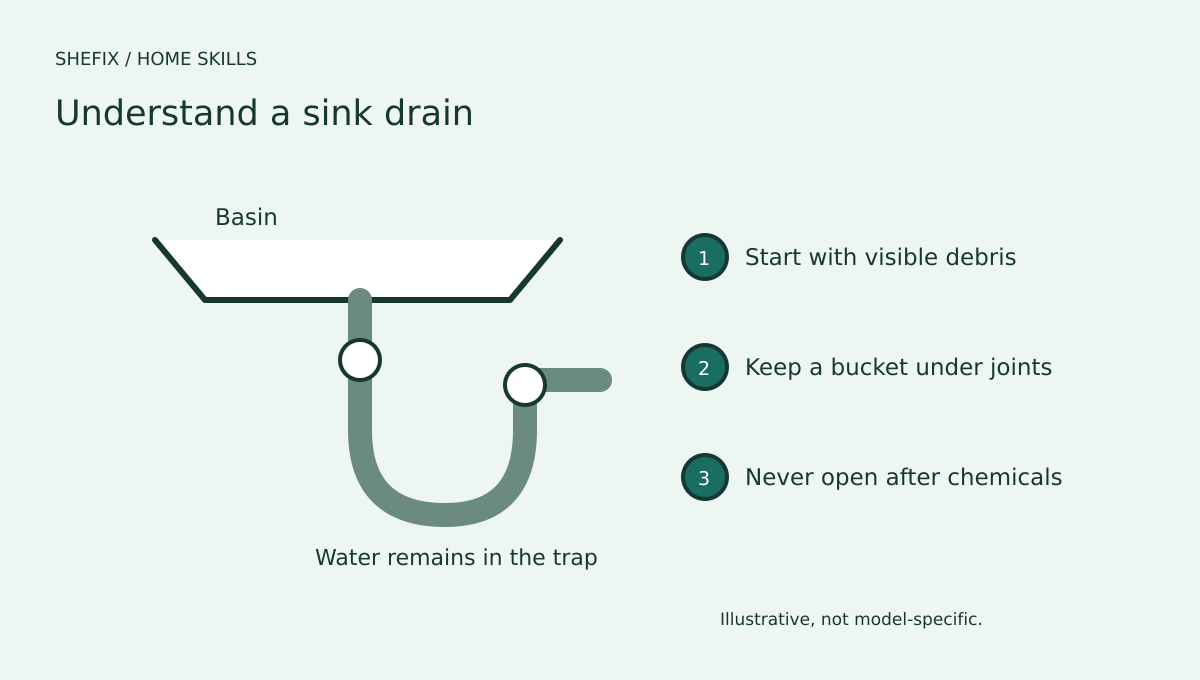
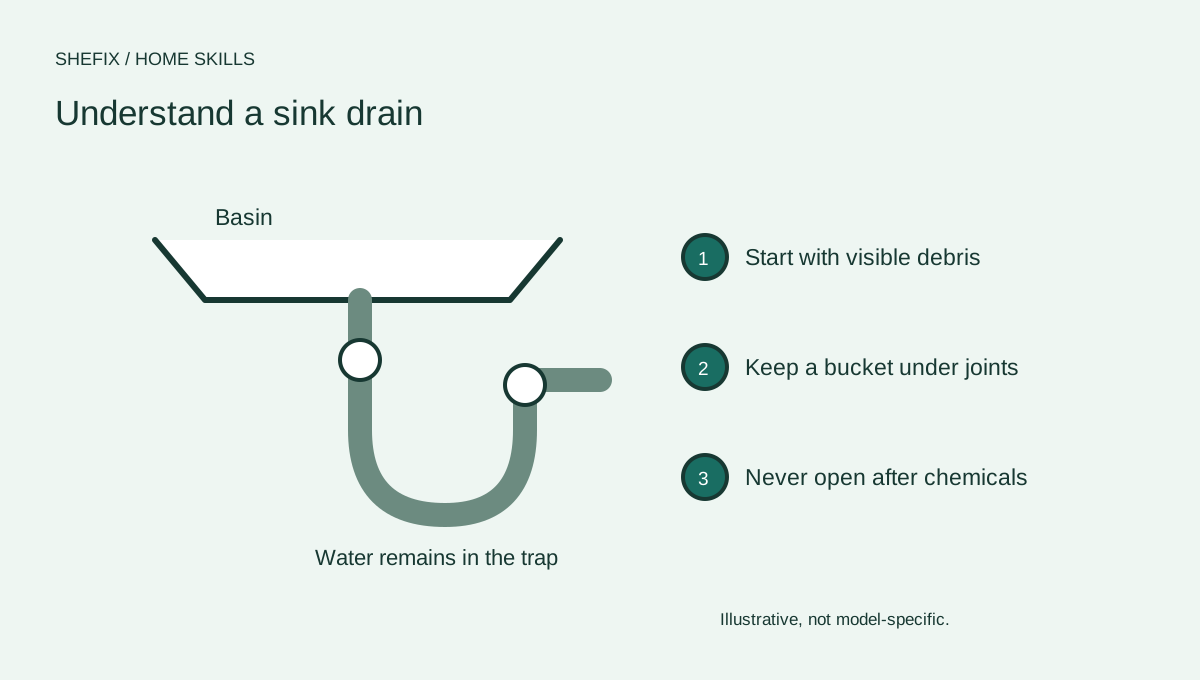
The curved trap beneath a sink holds water to limit sewer gases. It also catches dropped items and some debris. Opening it can release dirty water. Plastic slip-joint traps sometimes allow homeowner maintenance, but glued assemblies, corroded metal, unusual layouts, and inaccessible connections are reasons to hire a plumber.
If you proceed with a conventional removable trap, photograph every connection and washer orientation first. Place a bucket beneath it. Do not work on a trap after chemical drain cleaner has been used. Support the trap while loosening only the removable slip joints. Do not twist the wall pipe, disposal, or sink drain body.
- Remove the trap carefully over the bucket, following the assembly instructions.
- Clear debris into the trash, not into another household drain.
- Inspect washers and components for damage. Replace only with compatible parts; do not improvise a seal with tape or caulk.
- Reassemble in the original orientation. Tighten according to the fitting instructions, without crushing plastic nuts or over-compressing washers.
- Run a small amount of water and check each connection with a dry paper towel. Increase flow only after the first check stays dry, then recheck the cabinet later.
What to avoid
Do not mix bleach, acids, ammonia, or drain-cleaning products. Do not assume baking soda and vinegar will remove a substantial blockage; a fizzing reaction does not prove the drain is clear. Avoid boiling water in a sink with unknown pipes, seals, or materials. Use the care instructions for the actual drain assembly.
A motorized drain machine, pipe cutting, or dismantling a disposal is beyond this first-step guide. Pushing a tool further can damage an older line or lodge the tool. A drain that clears briefly and slows again may need professional inspection rather than a stronger version of the same attempt.
Know what success looks like
A successful simple clearing lets the sink drain normally without leaks, gurgling, or backup elsewhere. Check both draining and the cabinet beneath the sink. A clear drain with a new slip-joint leak is an incomplete repair. Keep the cabinet dry so a later leak is easier to spot.
Prevent repeat blockages with a suitable strainer and by keeping hair, grease, coffee grounds, and fibrous food out of the drain. Dispose of grease in an appropriate container. A disposal does not make all food waste safe for the plumbing.
Questions homeowners ask
Should I try a second chemical if the first fails? No. Combining products can create a dangerous reaction or exposure. Keep the area secure and contact the product's safety line or a plumber as appropriate.
Why do several drains back up together? The problem may be downstream of the individual fixture. A plumber can evaluate the system; continued flushing or running water may worsen the backup.
What should I tell the plumber? Name the affected fixtures, what happens when water runs, any products used, attempts already made, and whether accessible connections are leaking. Photographs of the under-sink layout can help explain the setup.
Your printable project checklist
Use your browser's PDF option to keep a copy. Create a free account to keep project records and compare professionals.
Sources & further reading
Follow the instructions for your specific equipment and confirm current local requirements.