Walls & Fixtures · All the Things Your Dad Should Have Taught You
How to Find Wall Studs Before Hanging an Item
Use a stud finder as evidence, map concealed-service risks, and choose a mounting plan suited to your wall, hardware, and load.
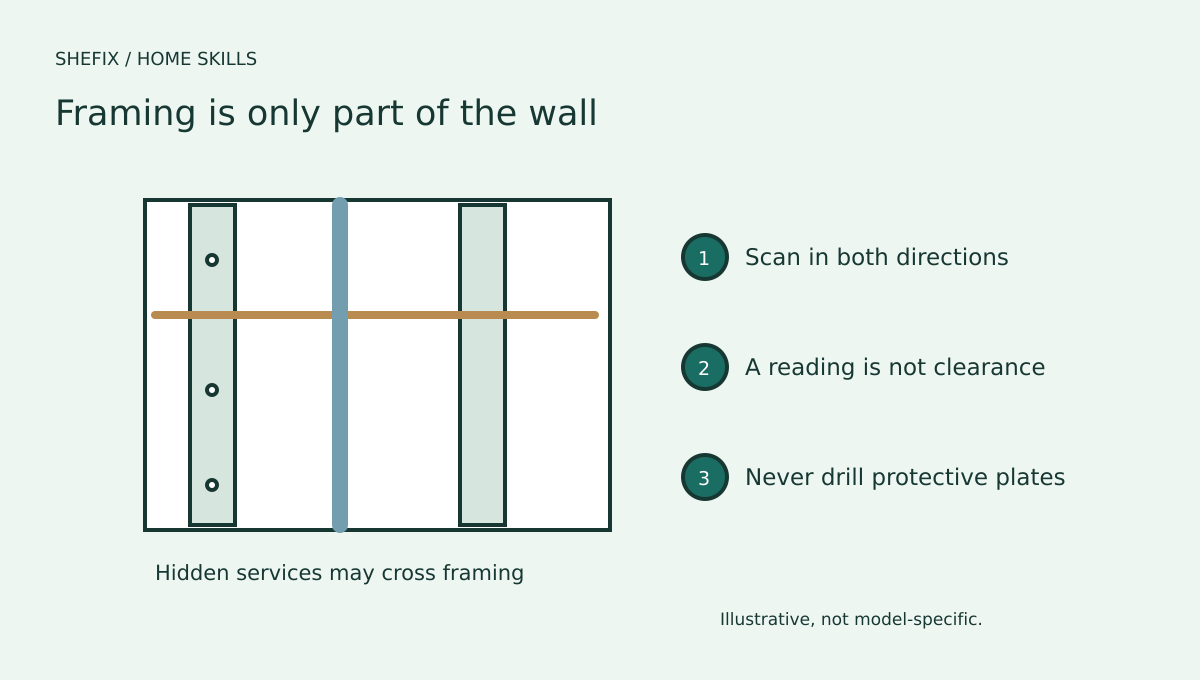
A stud finder is a clue-gathering tool, not permission to drill anywhere the screen lights up. Behind a finished wall there may be framing, wiring, plumbing, blocking, metal protectors, or other materials. Learning to identify framing and plan a fastening point helps with ordinary wall-mounted items, but it does not remove the need to understand the wall and the hardware.
This guide is for finding likely wood framing behind a conventional finished wall. Heavy televisions, overhead storage, grab bars, climbing equipment, and other critical loads deserve a mounting plan appropriate to the structure. Do not treat a generic stud-finder reading as a structural assessment.
Understand what the finder can detect
Electronic models respond to changes in wall conditions. Some have modes for deeper scanning, metal, or energized wiring. Performance depends on calibration, wall thickness, texture, and the manufacturer's technique. A wire warning can be useful, but the absence of a warning does not prove a wall is free of electrical hazards.
Magnetic finders locate metal, often screws or nails used to attach drywall. A line of fasteners may suggest framing, but a metal reading can also be a pipe, protective plate, or metal stud. A single point is not enough information for a mounting decision.
Do not assume every home uses wood studs or a single spacing pattern. Plaster, masonry, tile, metal framing, and remodeled walls require different tools or mounting methods. If the wall construction is unknown, get help identifying it.
Map the area before choosing a hole
Look on both sides of the wall if accessible. Note outlets, switches, bathrooms, kitchens, plumbing fixtures, and heating equipment. Their location helps you recognize possible concealed services, but pipes and wires do not always follow obvious paths.
Read the mounting hardware instructions before searching. The item may require more than one stud, a particular fastener size, or a specific backing structure. Determine the exact hole pattern and total load, including items that will later sit on a shelf.
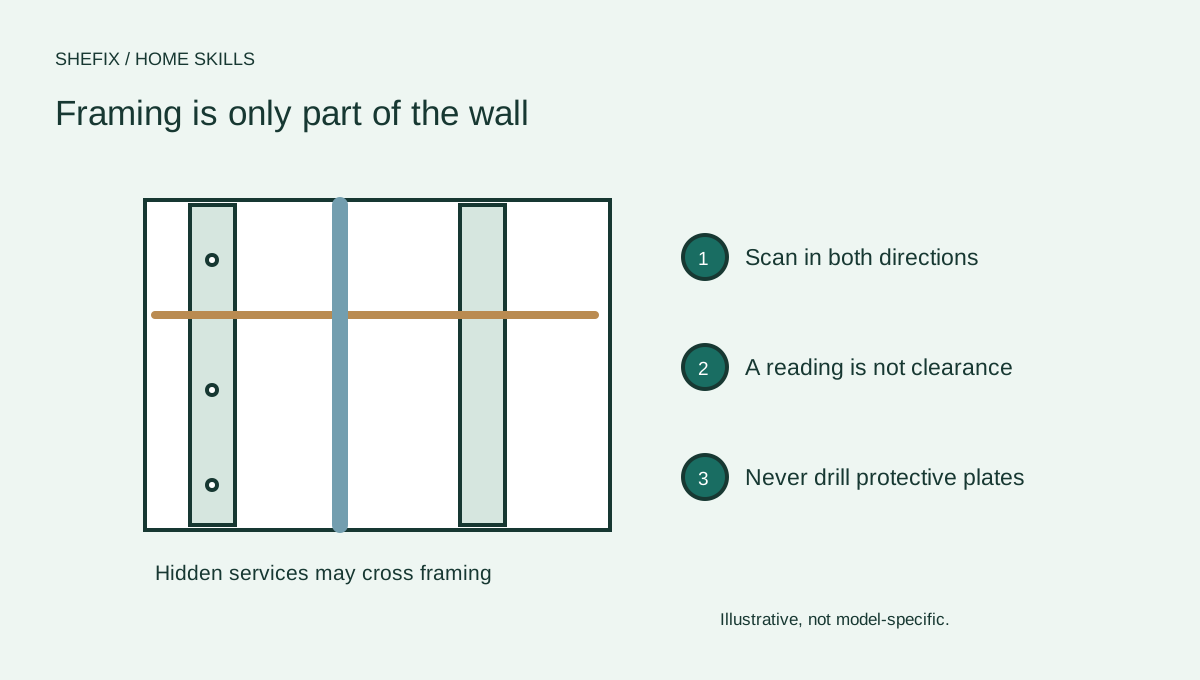
Use painter's tape or light pencil marks to record observations. Scan slowly across the same area in both directions, following the finder instructions. Mark the two apparent edges and the likely center rather than accepting a single beep. Repeat the scan at another height to see whether the pattern is consistent.
Build confidence without blind drilling
- Confirm the tool is suitable for the wall finish and has been calibrated as instructed.
- Scan across the planned mounting area from both directions.
- Mark apparent edges, then repeat above or below the original scan line.
- Compare the findings with visible construction clues and the item manufacturer's requirements.
- If readings conflict, metal is detected unexpectedly, or a warning appears, stop and investigate with professional help rather than drilling a test hole.
A pilot hole is still a penetration. It is not a harmless way to prove that nothing hazardous lies behind the finish. Do not drill near electrical or plumbing installations merely because the bit is short. If a protective metal plate is encountered, stop; its purpose may be to protect a service line. Never drill through it to reach framing.
Choose fasteners for the actual assembly
The hardware must match the load, wall material, mounting bracket, and substrate. A stud does not make every screw suitable. Fastener length, diameter, penetration, edge distance, and the condition of the framing matter. Follow the item's installation instructions or obtain an appropriate professional design.
For lightweight decorative items, a rated hollow-wall fastener may be an alternative when the wall material and load fit its instructions. Packaging ratings are not interchangeable between drywall, plaster, masonry, and damaged surfaces. Dynamic or safety-critical loads need special attention.
Do not mount a television, grab bar, or heavy cabinet with an improvised collection of fasteners because the finder readings are unclear. Paying for a proper mounting job is cheaper than damage or injury from a falling item.
Questions homeowners ask
Can I rely on common stud spacing? It is a useful expectation, not proof. Corners, openings, additions, and repairs can interrupt the pattern.
Does a magnetic signal prove there is a wood stud? No. It proves metal is present. More evidence is needed to identify the assembly.
What if the wall has tile? The tile, adhesive, substrate, and waterproofing may require a different approach. Penetrating a wet-area wall can damage water protection. Ask a suitable professional.
Create a useful mounting brief
Measure the item, record its weight and mounting instructions, photograph the location, and note any services on either side of the wall. Tell the professional whether the load is decorative, storage-related, or safety-critical. Ask how they will establish the substrate, select hardware, and avoid concealed services.
Save the final mounting method and hardware details. If the item is later replaced with something heavier, revisit the plan rather than assuming the old holes are appropriate for the new load.
Your printable project checklist
Use your browser's PDF option to keep a copy. Create a free account to keep project records and compare professionals.
Sources & further reading
Follow the instructions for your specific equipment and confirm current local requirements.